I've monkeyed around with a recipe until I have a favorite banana nut muffin. Here it is for your weekend enjoyment:
Ingredients:
1 1/3 cups all purpose flour
1 1/2 tsp baking powder
1 tsp salt
4-5 VERY ripe bananas-the more spots the better
2 cups walnuts, toasted
1 cup sugar
2 large eggs
1/2 cup whole milk
6 tbsp butter, melted and cooled a bit
1. toast the walnuts, either in the oven on on the stove in a dry skillet. Watch them closely and keep them moving around. They will smell nice and toasty when they are done. Let them cool while you prep the rest of the ingredients.
2. Preheat the oven to 425.
3. In a medium bowl, mix all the dry ingredients- flour, salt, and baking powder. Set aside.
4. In a food processor, mix 1 1/4 cups of the toasted nuts and the sugar. Process until it looks like damp sand.
5. coarsely chop the remaining nuts and set aside.
6. In a large mixing bowl mash up the bananas. add the sugar/nut mixture, butter, eggs, milk. Whisk together until well combined.
7. Add the flour mixture to the banana mixture and whisk just until there are no streaks of flour remaining.
8. Fold in the remaining chopped nuts and then in the words of a favorite tv chef- "just walk away." Let the batter rest for 15 minutes or so while you prep the pan.
9. Spray your muffin tins liberally with non stick spray or preferably the bakers spray with flour in it. Prep 12 muffin cups.
10. Scoop the batter into the muffin cups filling them almost completely. If you want shorter muffins fill them less full and you'll get a few more muffins from your batch. I like big muffins:) so I fill 'em up!
11. Bake at 425 for 17-18 minutes, checking for doneness. Cool in the pan for 10 minutes, then turn out and cool on a rack.
Enjoy!!
Friday, October 26, 2012
Saturday, October 6, 2012
sew simple
I was creative today! This project was inspired by this Pin.
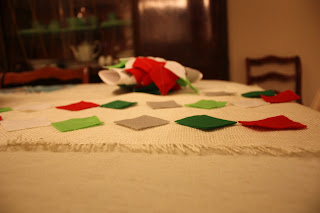
I put together some felt garland along with a cute burlap table runner.
I wanted to create some garland made with felt shapes, in fall colors, sewn together.
I picked up some felt sheets and cut them into squarish shapes- I wanted my garland to be less uniform (a.k.a -it's easier to cut crooked squares vs. precise ones vs. circles).
I created the color pattern I wanted and then started sewing through diagonally one after another until I was done! You don't really even have to sew in a straight line!
I originally thought I was going to use the garland on the mantle- but it just looked too busy and didn't fit with our living room style so I hung it up in the kitchen/dining room and was even more inspired to make up a super easy and quick table runner to use with the garland on the table.
To make the table runner:
I cut the burlap to the size I wanted for our table and then pulled out threads from the loose weave until I had the edges frayed to the length I wanted.
Once the edges were frayed, I sewed around the entire runner on the edge of the non frayed burlap. I trimmed the edges so they were all the same and pressed it- Done!
Onto the the table went the runner and I just laid the felt garland on top. I hung the rest between the kitchen and dining area.
It was so quick and easy I even sewed up some garland in Christmas colors. I can just switch out the garland in a couple of months for the Holidays!
Labels:
burlap,
decorations,
Fall,
felt,
garland,
pinterest,
table runner
Subscribe to:
Comments (Atom)


